Fixing a Mini Controller
A quick look into my teardown and analysis processes

This post can be seen as more of a fluff post of sorts. Nothing much particularly to learn, for more seasoned tinkerers and engineers, however it may provide a little insight for less experienced individuals wanting to get into basic hardware fixes. With my background in hardware tinkering as well as electronics repair and refurbishment, I figured there may be something of value in any case from a quick writeup.
I ran through this process back in early March, captured photos at the time. Just never wrote anything up on it until now. Figured I might as well write something up whilst on holiday travels. Regardless, I think it would be a spot of fun to write, and it’s been a decent bit since my last post.
Anyway, let’s get into it.

We start with a pretty basic controller. I tried turning it on and connecting it to the drone (a very small, cheap quad-prop drone I got as a gift from a family member). Nothing really seemed to work, it felt like things were glitching out. So I started by checking the battery compartment. Took a single screw to open, using a Philips head screw driver to open.


Easy enough. Just pry it open and— Corrosion! Yuck, that’s no good.
There were batteries in here too, I just removed them before I took out my camera… but those were pretty badly messed up too. Threw those away real quick.
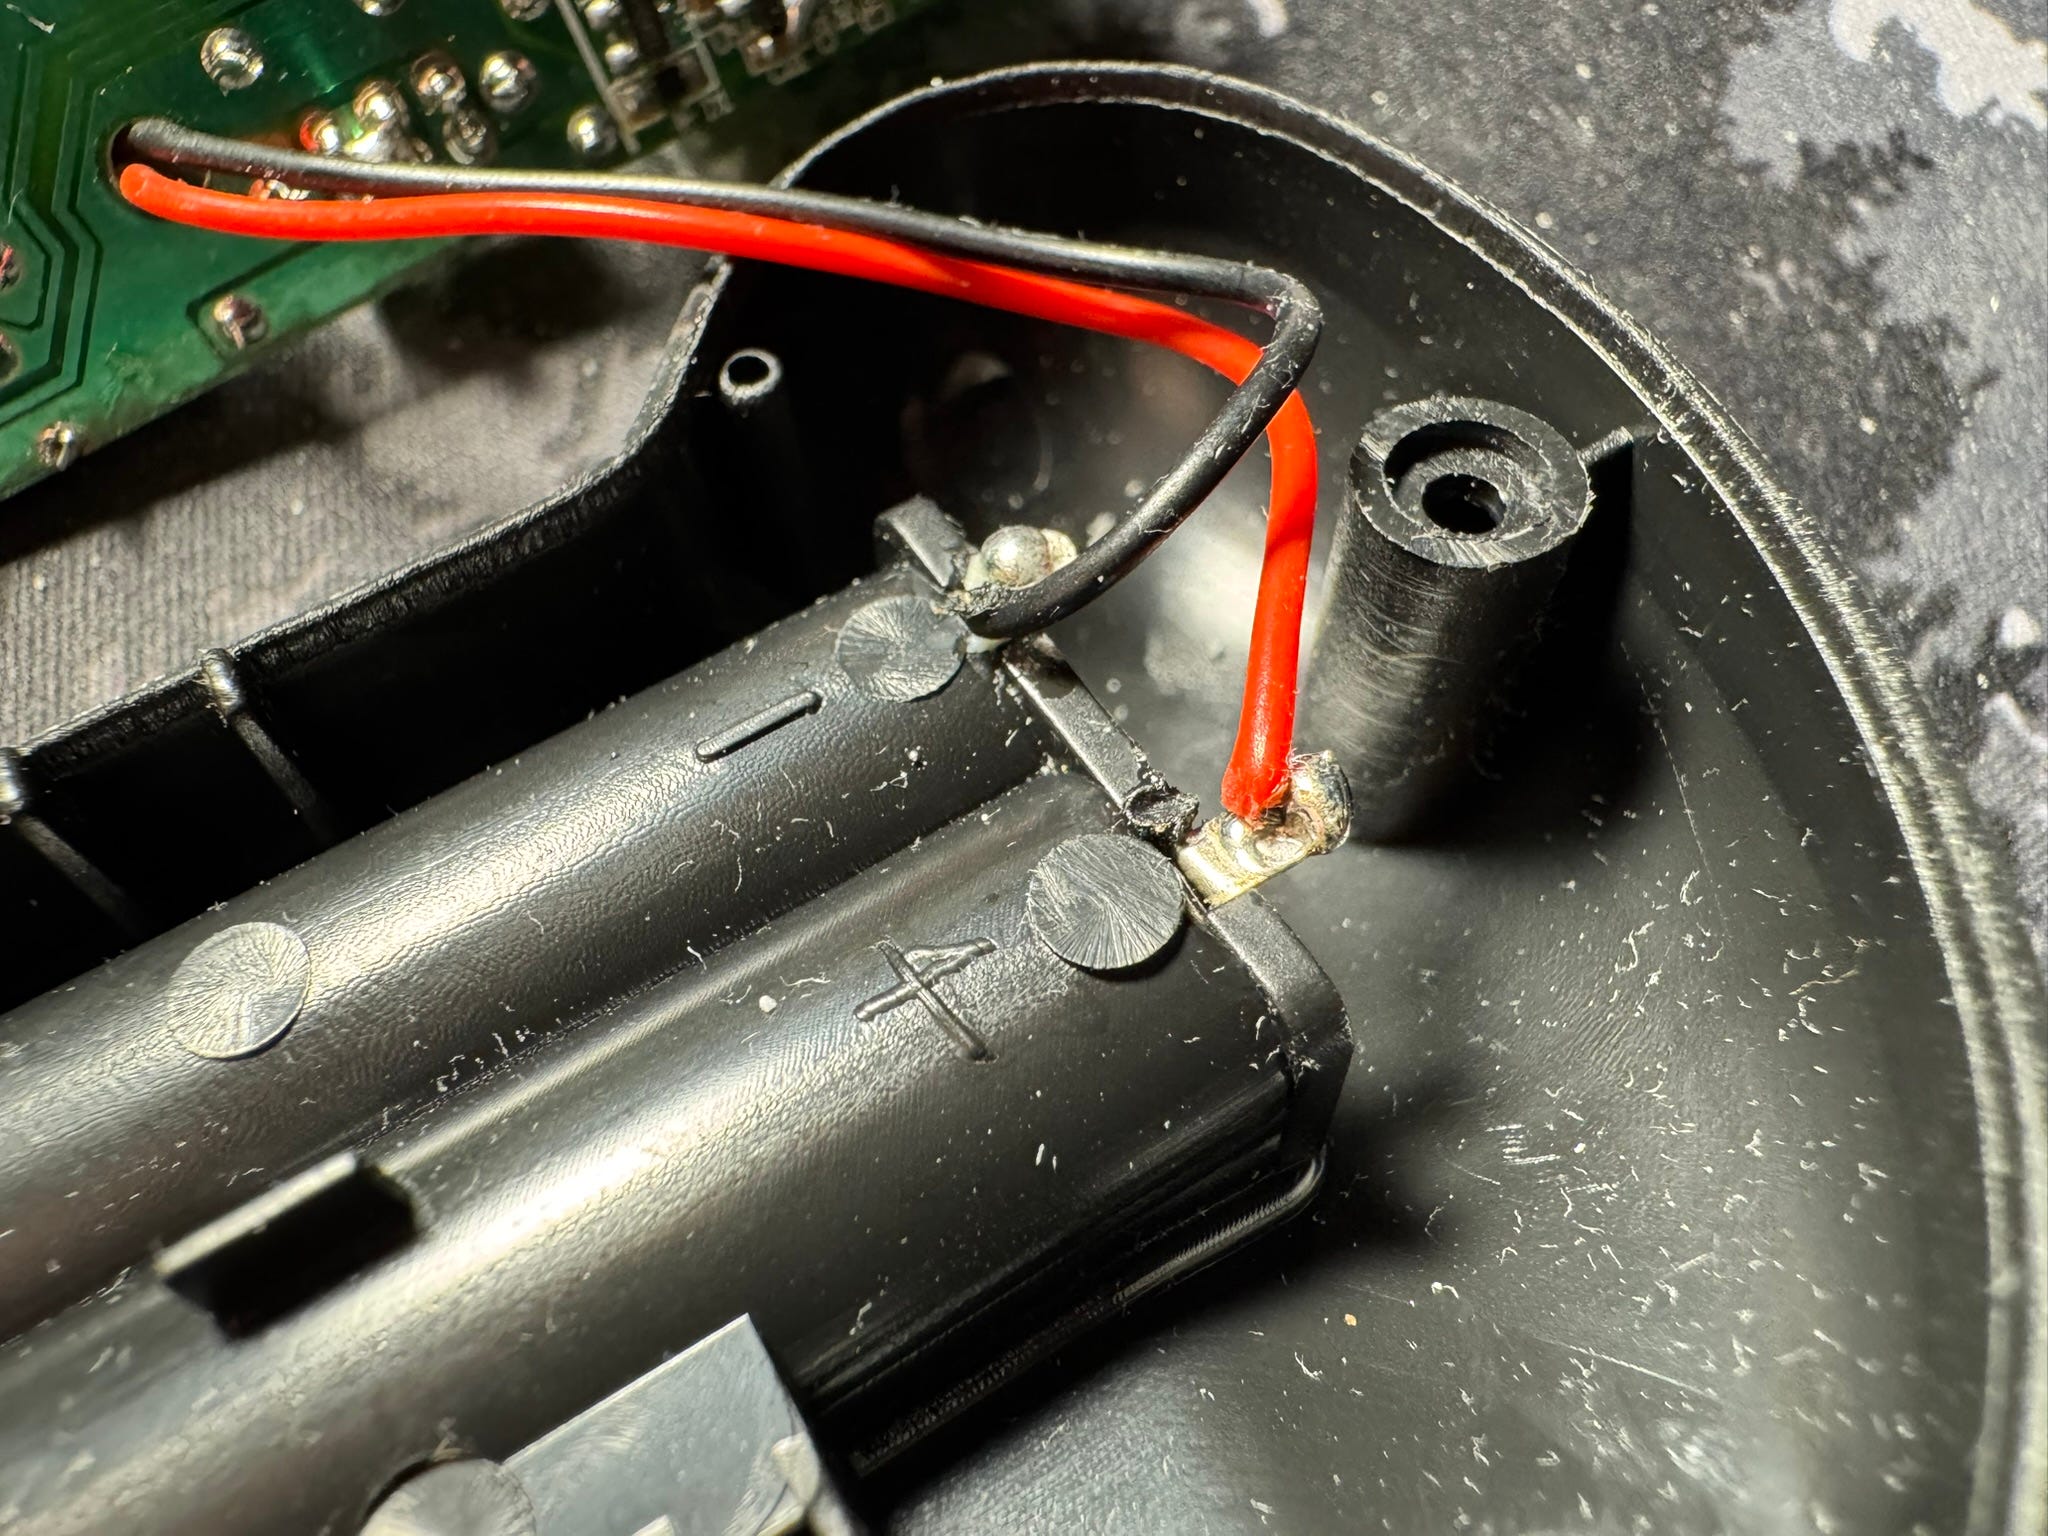
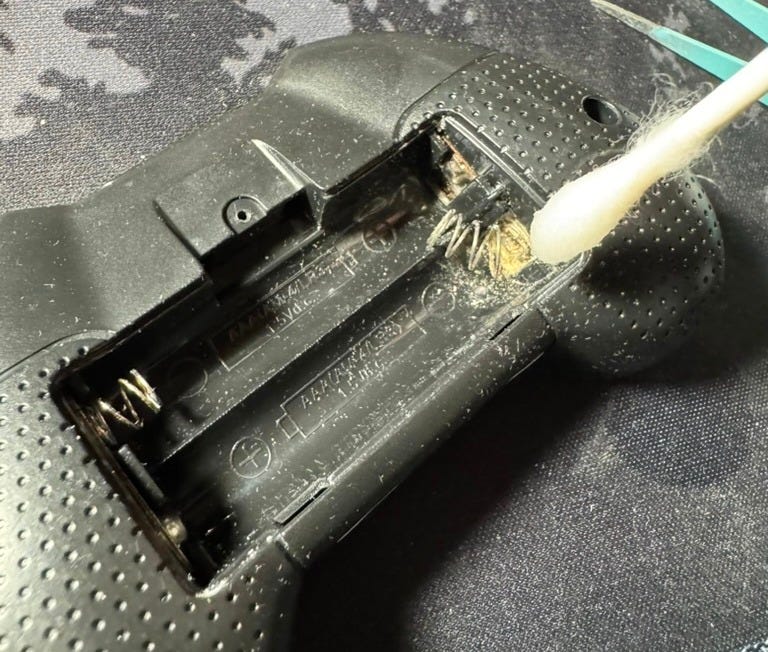
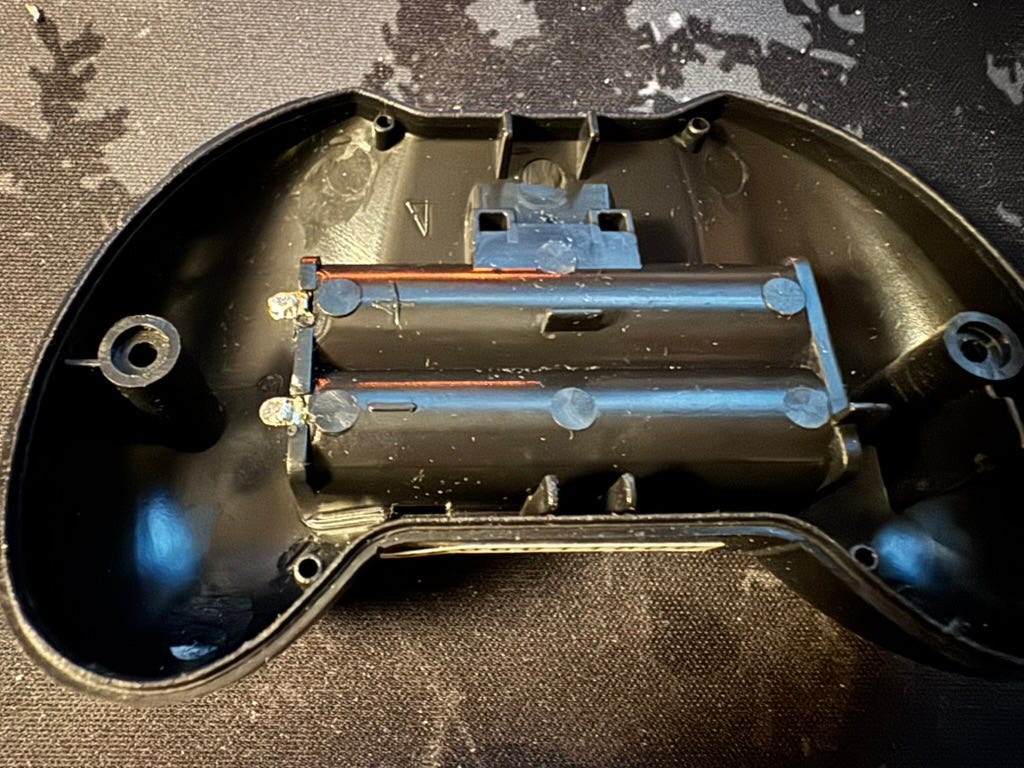
From here though, I knew I needed to clean things up a bit. But I can’t reach everything for a deep clean from here, not even with cotton-tipped sticks dipped in alcohol. So a disassembly was needed. Those two screw holes — one on each side — seemed a decent place to start. Unscrewing those yielded entry.


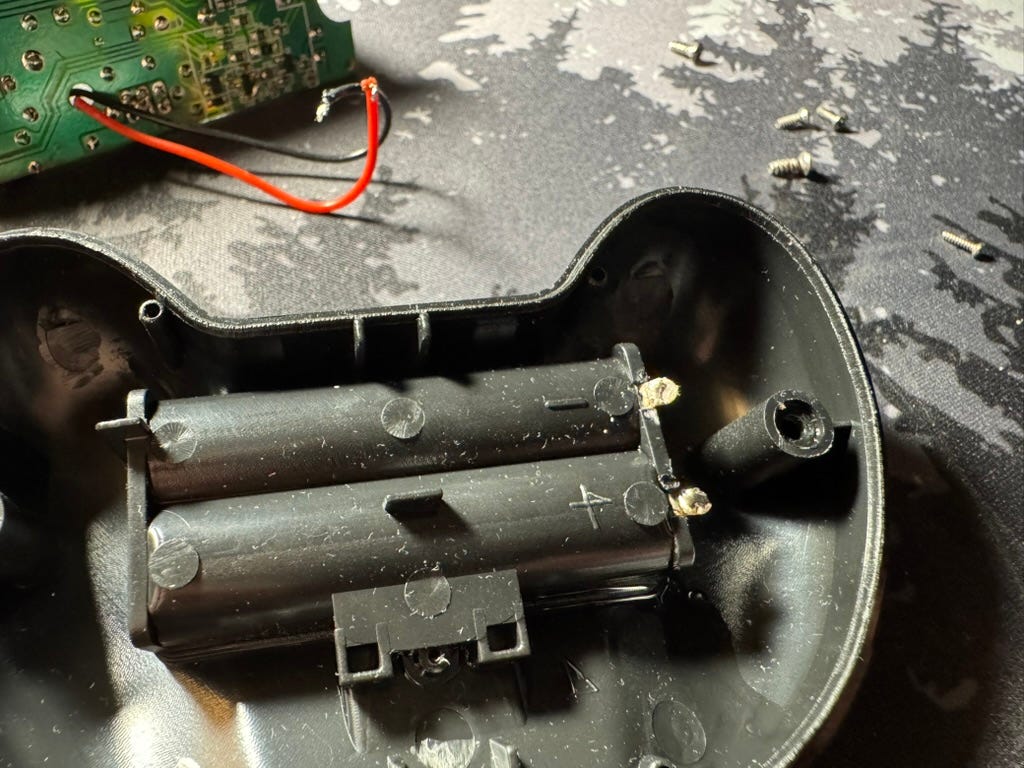
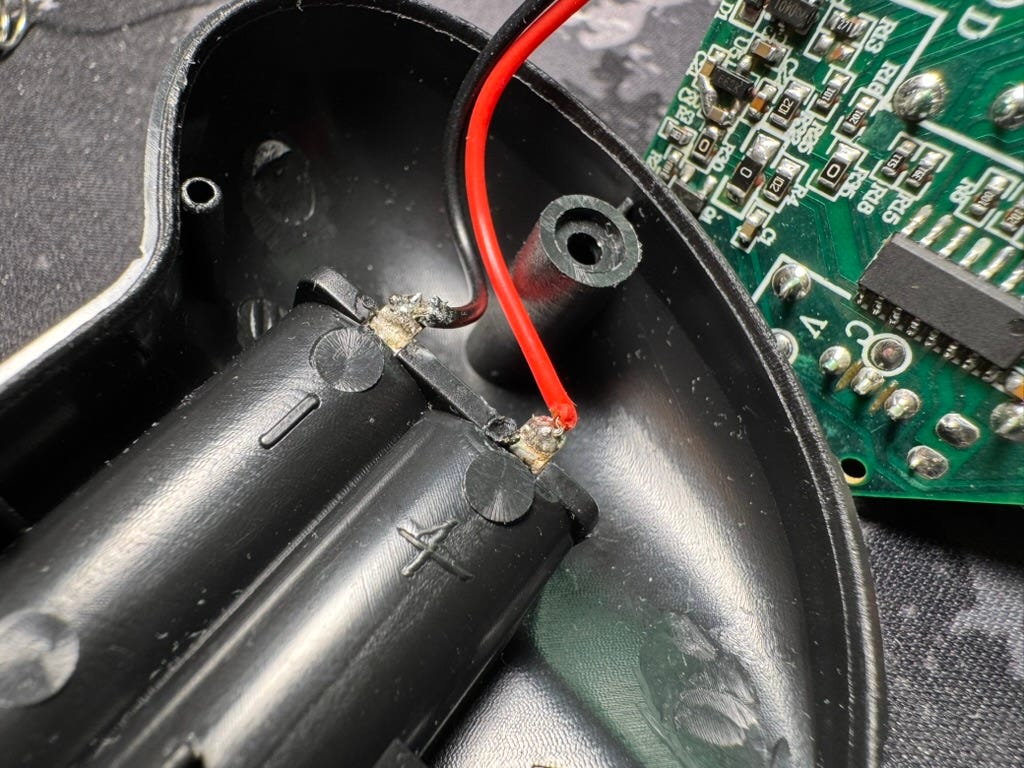
Here, we can see the positive and negative terminals from the battery area. Corrosion is present here too, at the Ground soldered pad. Fortunately, this is very basic soldering between the wire and the battery leads — it relies on both batteries being in place (facing opposite directions) to complete the circuit. Simple, cheap, and effective. Seems the electronics of the battery area was just bent to be structural against the plastic. Cleaning that metal bit would require desoldering of the wires and careful application of alcohol.
I also wanted to make sure nothing on the main board was messed up either, due to corrosion. It shouldn’t have any damage, but it’s worth checking just in case.

Okay phew! Everything on the main board seems in order and everything should be working as expected. No corrosion on the power leads here. With that, I got to desoldering for cleanup on the back-end. And later, alcohol on cotton-tipped sticks to clean the front springs too.
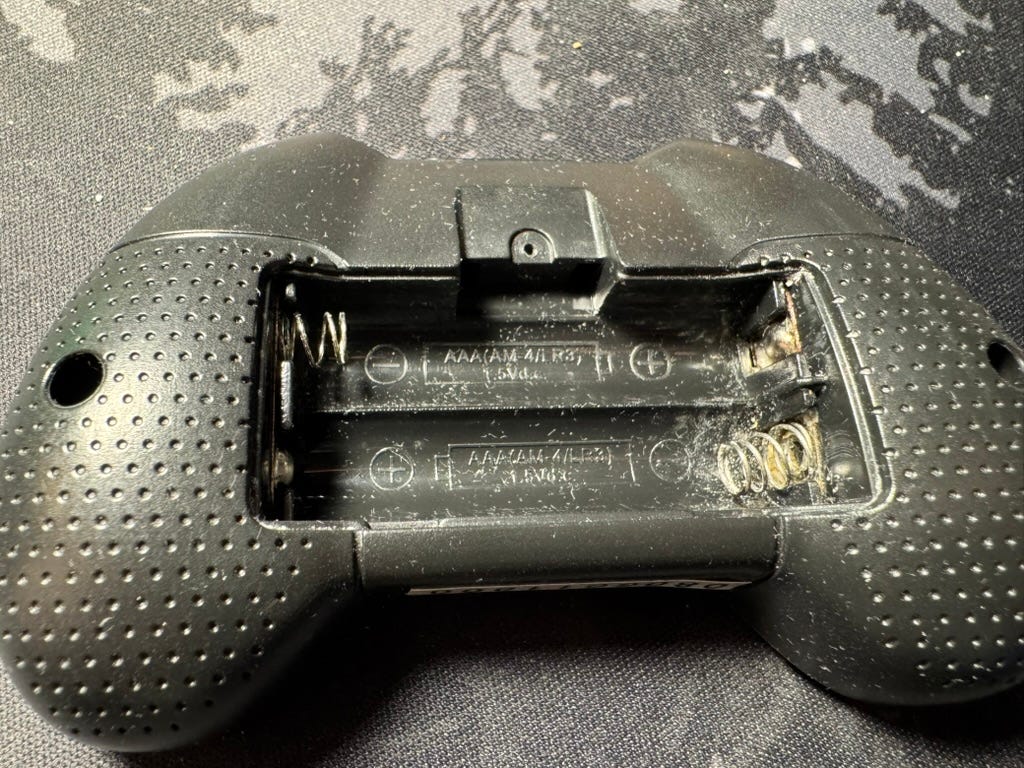
After everything, it probably wouldn’t have been the absolute cleanest thing ever… but it’s definitely an improvement, and it gets the job done. For refurbishment and repair, or in this case, just cleaning up… well, for something of this price point, I feel a quick-and-dirty cleanup job would be enough. It’s not like any complex or sensitive electronics, so it should be able to hold up easily enough to most things thrown at it.
Essentially, this is more of a time- and effort-based problem than a complexity problem. As they say, time is money, and in this case, any extra time or effort spent on trivial tasks may not yield as much benefit as the time may be worth. Funny enough, the value of time was something I learned quite quickly and intimately during my time in-office working at Bigscreen with the engineering and refurbishment processes. Overall, the idea is 80/20. Work with 20% effort to achieve 80% results. In other words, min-maxing professional work. And this can be applied to really everything in hobbies, especially with tinkering, when working toward a desired effect.
When working in small companies, especially with hardware, it isn’t just important, but often crucial, to work quickly, achieve desired effects, and avoid spending time on unnecessary tasks i.e. office politics, etc. Simply pushing for end-results often provides the biggest return on investment (where time is an economic resource), and with this behaviour, it can make you an unstoppable asset in a team.
That also being said, it must be also understood when to apply this method of thinking. The idea of “move fast, break things” should only apply when necessary. Otherwise, the idea of “do things once, do it right” should also be understood, especially in terms of production. In other words, if there’s a process that needs to be followed repeatedly, might as well get it done right the first time, so it produces desired effects repeatedly, as opposed to things being done right by random chance. I find this to be the difference between production and refurbishment versus tinkering and prototyping.
Anyway, back to the controller… Bending the spring back showed a result of “good enough for me”, as with the desoldered side as well, post-cleanup.
Soldering up the leads again (being extra sure to connect the red wire to the + terminal and black wire to the - terminal), keeping it clean, and then throwing batteries back in, I decided it’s time to check the results of this work. Of course, I decided to use rechargable AAA batteries, as these are a little more sustainable than non-rechargable ones, and it’s also more convenient for me than to keep going out and buying AAA batteries from the store.

Upon first time firing up the controller, there were some minor clicking issues… but after a few tries and power cycles, I managed to get things running very nicely. Here are a few videos of my trial and error process. Simply, I just left the controller open with full access to the PCB in case anything went wrong while testing, which allows me to diagnose everything before closing it back up again.
Video of the board “clicking” (still don’t know why it did that):
And finally, after a couple power cycles, it worked again!
At this point, I closed everything up, reversing the process of opening. Fortunately, all the screws were easy enough to remember which went to what, based on length of screw. Everything was also using a Philips head, which made it much easier, not needing to switch screwdriver bits.
In the following video, the main issue I’ve been running into was just pitch and roll calibration angles — trying to set it with these buttons is pretty finnicky, especially in attempts to get perfectly stable hovering… but the end effect is that the drone works again!
Connecting to the drone is easy enough, so long as the drone’s mini battery is juiced up enough. Seems to only work for a good minute or so before the charge is drained enough for the propellers to no longer propel sufficiently to take off. I suppose this means, if I wanted a more efficient drone, or longer-lasting up-time, I’d need to upgrade my hardware in some way… but oh well — I suppose that’ll be a problem for later. Until then, I suppose I’ll keep messing with this cheap toy drone for the time being. It’s fun enough for the time I have motivation and attention span to fly it around my bedroom at least.
Thanks for reading! If you found something informative or helpful from this post, feel free to let me know. Still working on posting a little more regularly, but life does get busy every now and then. However, I hope to bring something interesting or helpful to every post regardless.
Edits: deleted reminder-to-self text and meme for video attachments, inserted videos at end of article.